In the world of software development and system administration, efficiency is key. iTerm2, a powerful replacement for the default Terminal app on macOS, offers a configurable and scriptable status bar that can significantly boost productivity. This comprehensive guide will explore how to set up and customize the iTerm2 status bar to supercharge your workflow and keep essential information at your fingertips.
Understanding iTerm2's Status Bar Capabilities
The iTerm2 status bar is a versatile feature that allows users to display a wide range of information and interactive elements at the top of their terminal window. Key components include:
- System Resource Monitors
- Shell Information
- Version Control
- Time and Date
- Custom Actions
- UI Affordances
One of the most powerful aspects of the iTerm2 status bar is its scriptability. Using the Python API provided by iTerm2, you can create custom components that display dynamic information or perform complex actions, tailoring your terminal experience to your specific workflow.
Step-by-Step Guide to Configuring Your iTerm2 Status Bar
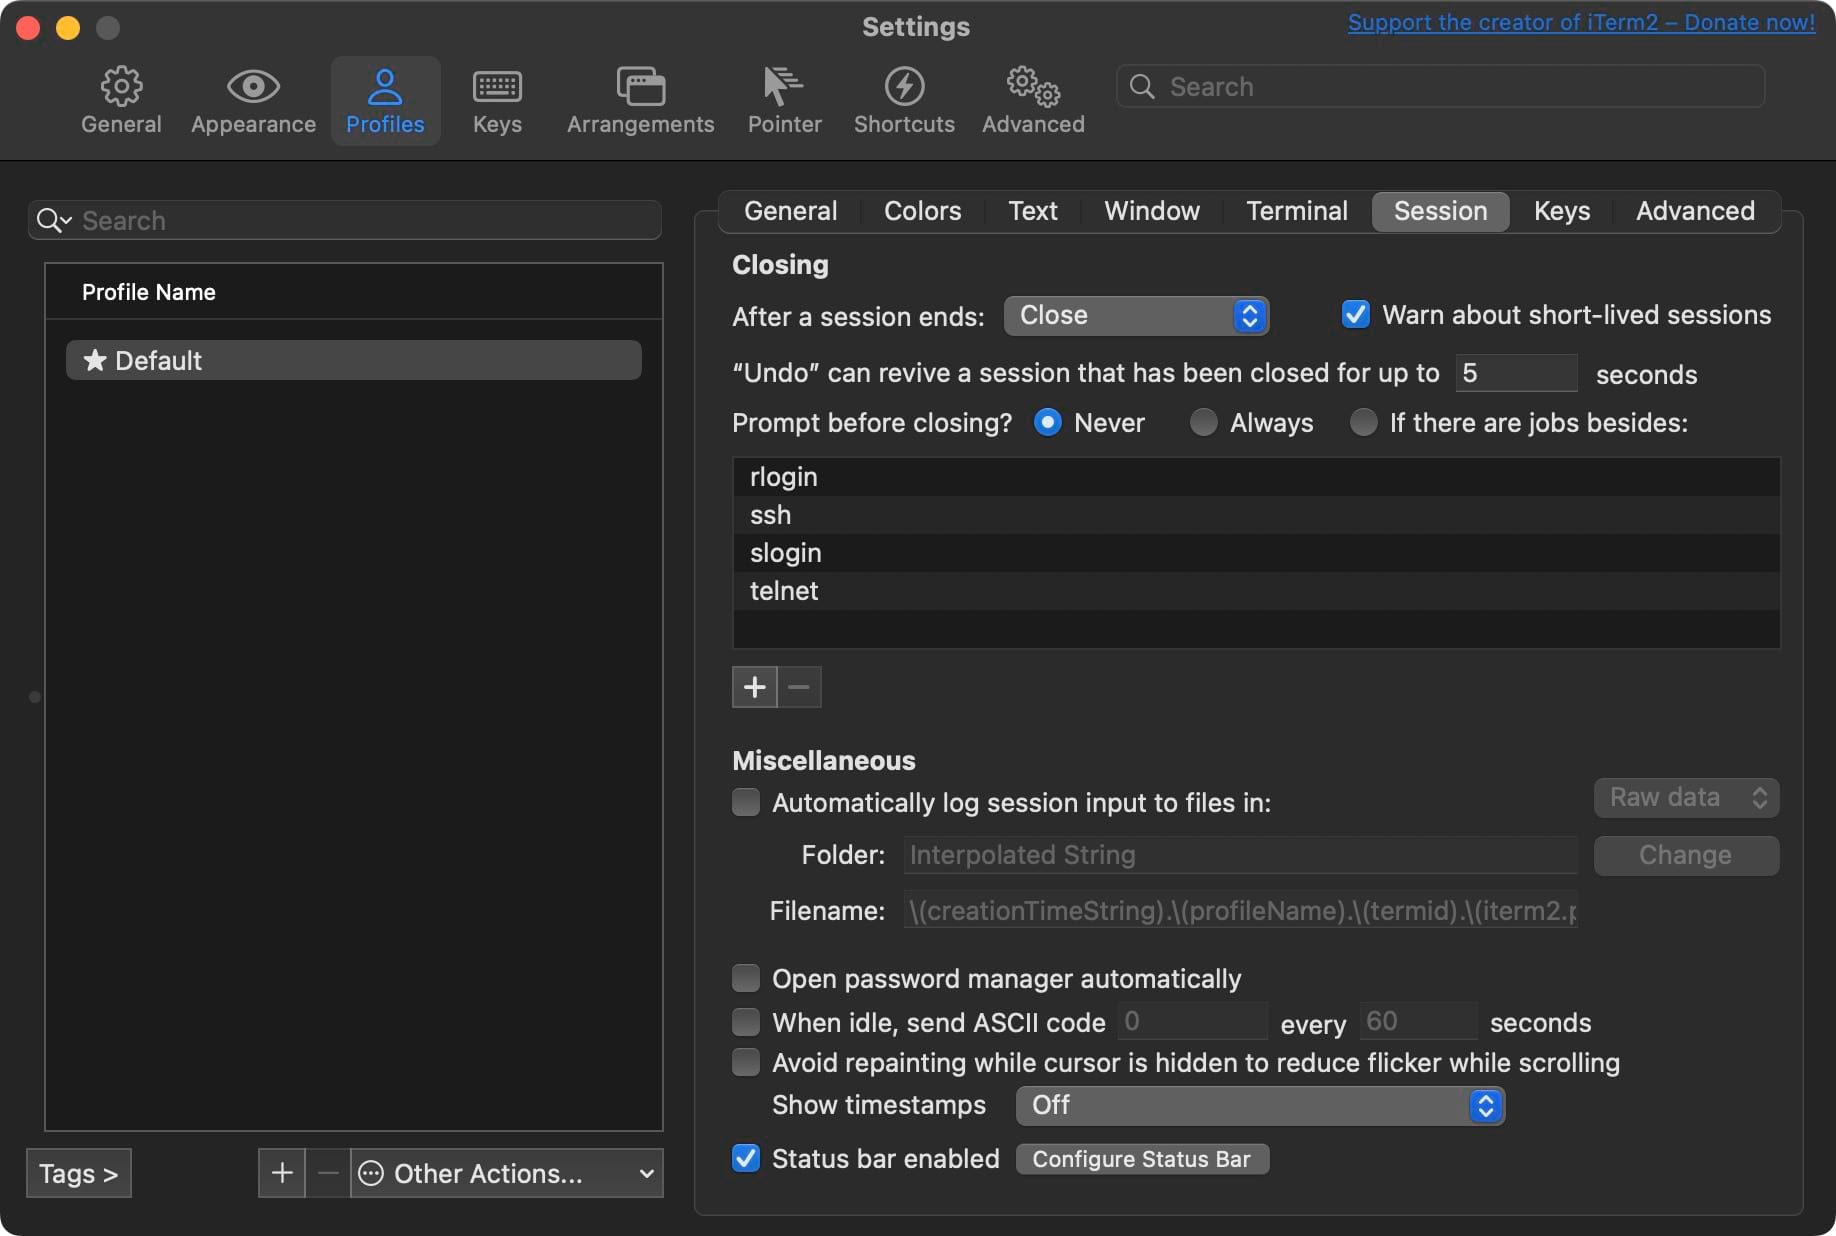
Step 1: Enable the Status Bar
- Open iTerm2 and go to Preferences (Cmd + ,).
- Navigate to Profiles > [Your Profile] > Session.
- Check the box next to "Status bar enabled".
- Click on "Configure Status Bar" to open the configuration panel.
Step 2: Add Components
- Browse through the available components in the top section of the configuration panel.
- Drag and drop desired components into the "Active Components" area.
- Common choices include CPU, Memory, Network, Git, Current Directory, and Clock.
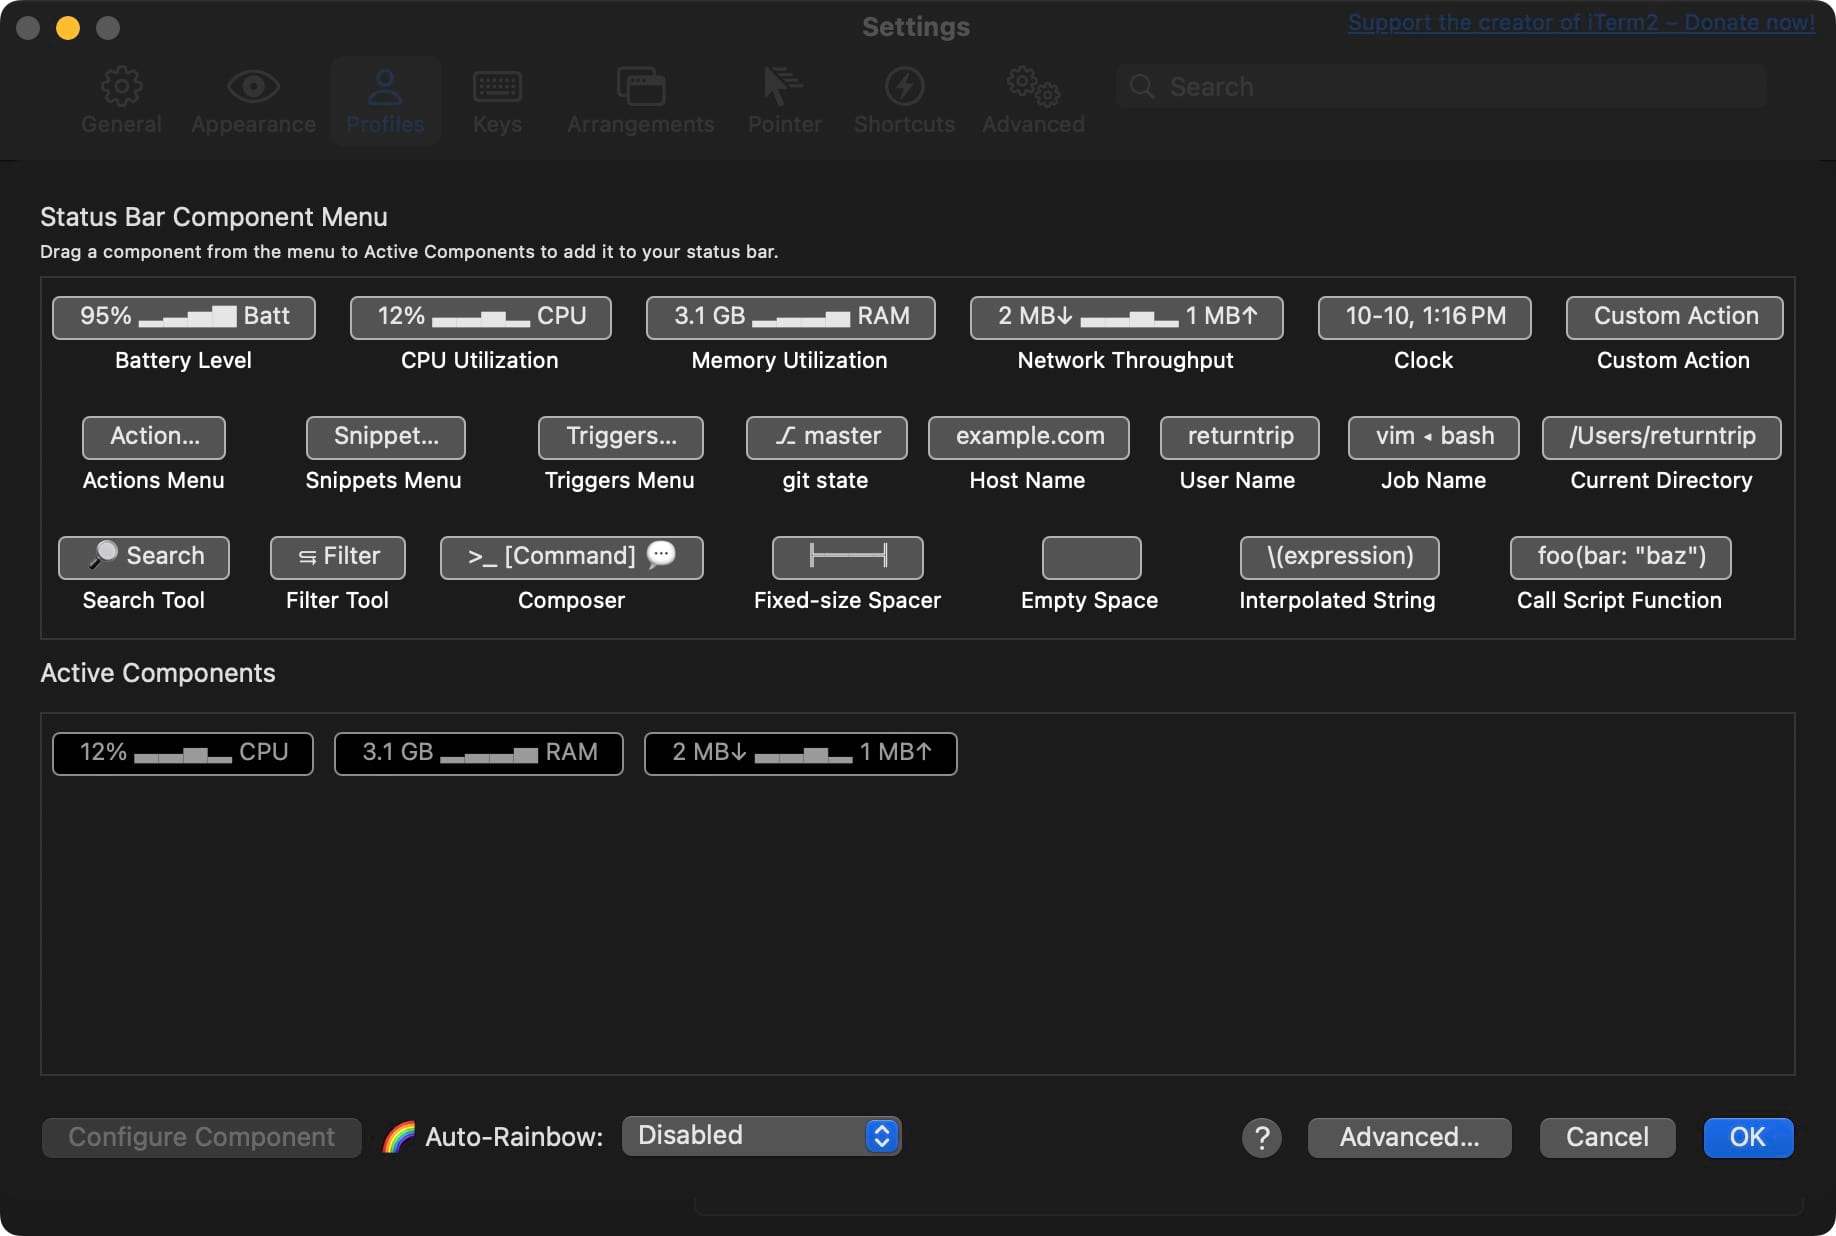
Step 3: Configure Components
- Select a component in the "Active Components" area.
- Click "Configure Component" to adjust its settings.
- For example, with the Clock component, you can set a custom date format like "dd-MMM-YY HH:mm".
Step 4: Arrange Components
- Drag components within the "Active Components" area to reorder them.
- Consider placing your most frequently referenced information on the left for easy visibility.
Step 5: Adjust Advanced Settings
- Click the "Advanced" button in the configuration panel.
- Set a custom background color to make your status bar stand out.
- Choose a font that's easy to read at a glance.
- Adjust the "Layout Algorithm" based on your preference for component spacing.
Step 6: Test and Refine
- Close the configuration panel and observe your new status bar in action.
- Open a few terminal sessions to see how the status bar adapts.
- Pay attention to which components you find most useful and which you rarely reference.
- Return to the configuration panel to make adjustments as needed.
Pro Tip: Use the "Auto-Rainbow" feature to automatically assign distinct colors to your components, making them easier to distinguish at a glance.
Advanced Scripting for Custom Status Bar Components
For developers and power users, the ability to create custom status bar components through scripting is where iTerm2 truly shines. By leveraging the Python API provided by iTerm2, you can craft components that display dynamic information, perform complex actions, and integrate seamlessly with your workflow.
Getting Started with iTerm2's Python API
- Install the iTerm2 Python runtime by going to Scripts > Manage > Install Python Runtime.
- Familiarize yourself with the iTerm2 Python API documentation and examples.
Advanced Scripting Techniques
- Interactivity: Make your components interactive by handling clicks.
- Dynamic Updates: Use the
update_cadenceparameter to control how often your component updates. - Knobs: Allow users to configure your component without modifying the script.
- Integration with External Services: Use libraries like
requeststo fetch data from APIs and display it in your status bar.
Best Practices for Custom Components
- Performance: Ensure your scripts are efficient, especially if they run frequently.
- Error Handling: Implement robust error handling to prevent crashes or incorrect information display.
- Configurability: Use knobs to make your components flexible and adaptable to different user needs.
- Documentation: Provide clear documentation for your custom components, especially if you plan to share them with others.
Optimizing Your Workflow with Status Bar Integrations
Integrate your status bar with existing tools and workflows to maximize productivity. Consider creating components for:
- Version Control Integration: Detailed git status information.
- Task Management Integration: Current sprint progress or active tasks.
- Docker Container Management: Active container status and health.
Tailor integrations for different developer roles:
- Front-End Developers: Browser compatibility checker, CSS specificity calculator, JavaScript bundle size monitor.
- Back-End Developers: Database connection status, API response time monitor, server load balancer status.
- DevOps Engineers: Kubernetes cluster health, CI/CD pipeline status, infrastructure cost tracker.
Troubleshooting Common Status Bar Issues
- Status Bar Not Appearing: Ensure it's enabled in preferences, restart iTerm2, and check for conflicting themes or plugins.
- Custom Components Not Loading: Verify Python runtime installation, check script permissions, and review iTerm2's debug logs.
- Performance Issues: Reduce update frequency of components and optimize scripts for faster execution.
- Inconsistent Information: Ensure proper error handling in scripts and verify API tokens and URLs for external services.
- Compatibility Issues: Check iTerm2 release notes for changes affecting custom scripts or status bar functionality.
Performance Optimization Tips
- Prioritize Components: Use priority settings for critical components when space is limited.
- Efficient API Calls: Implement caching mechanisms to reduce external API calls.
- Asynchronous Operations: Use asynchronous programming techniques to prevent blocking operations.
- Batch Updates: Implement batching for components that update frequently.
- Profile Your Scripts: Use Python profiling tools to identify and optimize performance bottlenecks.
Security Considerations
- API Key Management: Use environment variables or secure key management solutions instead of hardcoding sensitive information.
- Input Validation: Properly validate user input to prevent security vulnerabilities.
- HTTPS for External Requests: Always use HTTPS when making requests to external services.
- Regular Updates: Keep iTerm2 and third-party libraries up to date for the latest security patches.
- Sandbox Awareness: Be mindful of iTerm2's sandbox environment limitations when designing components.
Conclusion
The iTerm2 status bar is a powerful tool that can significantly enhance your productivity and streamline your development workflow. By leveraging its configurability and scriptability, you can create a personalized terminal experience that provides at-a-glance information and quick access to frequently used commands and data.
As you continue to refine your iTerm2 setup, remember to regularly review and update your configuration, stay informed about new features, and share your innovations with the community. Your perfect terminal setup is waiting to be discovered, so experiment, create, and make your iTerm2 experience uniquely yours!